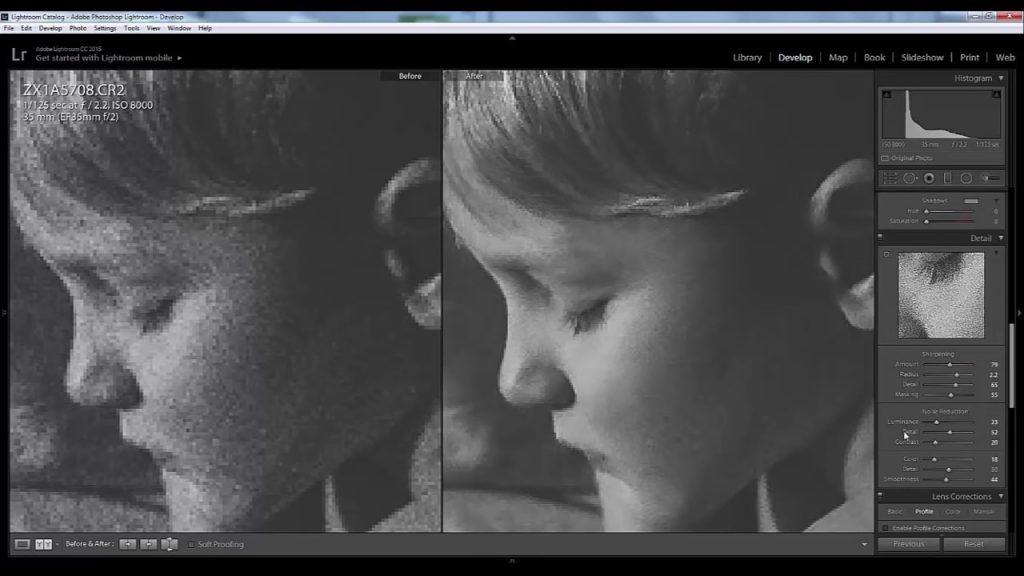
In the field of photography, the word noise refers to the graininess and false color transmission in the image, which often leads to loss of detail and distortion of color reproduction.
Noise is the same electronic interference that you see on the TV screen, you hear it on the radio or during a telephone conversation. In the chambers, this noise appears to be something like sand granules, which, as the noise increases, themselves increase in size, color variations and become more and more messy. In most cases, good cameras can quite satisfactorily mitigate noise, and cameras with full-frame matrices cope with this task best.
The noise in the photos increases as the ISO value increases or when the shutter speed is extended, since the so-called signal-to-noise ratio is then increased. Trying to get more photo information, we amplify the signal, but this inevitably leads to errors in transmission (respectively, to the appearance of noise).
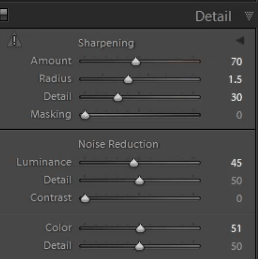
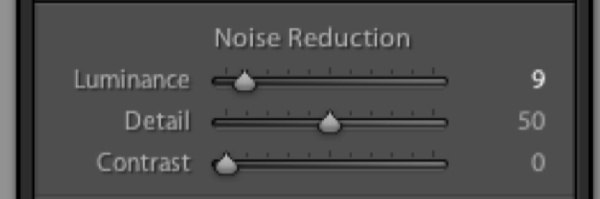
In the Develop module in Adobe Photoshop Lightroom, you’ll find a section called Detail, where the tools Sharpening and Noise Reduction are located. The Noise Reduction tool is divided into two sub-sections: Luminance and Color. Each category has its own set of correction sliders.
The Luminance slider is responsible for the graininess, and the Color slider for the noise color. Accordingly, the first slider will soften the grain, while the second will work with elements whose color is knocked out of the overall picture. Since the program delimits the areas of noise suppression, you can understand what type of noise prevails in your photo.
Other noise suppression tools
Sometimes there is a need to apply the noise suppression function selectively, i.e. not all parts of the image. Three tools in the program LightRoom allow you to do this: Radial Filter, Gradient Filter and Adjustment Brush. Each of these tools has a slider, with which you can adjust the noise only in areas to which this tool was applied.
Selective application of the noise reduction function is particularly useful in cases where a global change will result in loss of image quality or when you want to have more control over the application of this effect. For example, when you increase the brightness of the shadows, they have the ability to make more noise than bright areas. You can apply one of these tools to reduce noise in the shadow areas of your photo.